 Along with file sharing WiFi hotspot also allow us to share the laptop internet with the WiFi enabled devices without using a WiFi modem. In Android, iOS, Bada OS and even in the Windows mobile OS too, there is a much simpler one click option available to share the internet with other devices. Unfortunately, there is no one click option included in windows to share the laptop internet.
Even the Android like one click WiFi hotspot option not available in Windows OS, it will not be a pain in the ass to share the internet. You can enable internet sharing in windows by following the simple steps provided in this post.
First, we will create a virtual WiFi adapter with an access point name and password. Then we will share the LAN adapter’s internet with the created virtual WiFi adapter.
Note:
Before following the create WiFi hotspot method, make sure that your PC hardware supports the hotspot feature. To check the availability follow the steps below...
1. Open Command Prompt (CMD) [ Press Windows + R and type CMD hit Enter]
2. Type netsh wlan show drivers hit Enter button
If the result shows Yes on Hosted network supported, then go ahead, If it shows No, then sorry your PC/Laptop not support Wifi Hotspot (you cant create).
How To Create WiFi Hotspot in Windows 7,8 and 8.1 ?
To make the Wifi hospot start and stop simpler I made two bat files start.bat and stop.bat. To share the Internet you won’t need to enter any command at CMD simply download the bat files and follow steps...
1. Download the bat files - start.bat | stop.bat
Edit start.bat using notepad to change the wifi network name and password then save it.
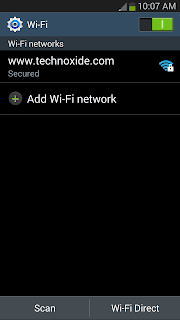
ssid=www.technoxide.com (Network Name)
key=technoxide (Password)
2. Right Click on start.bat and select Run as administrator.
(It will show the CMD black screen and will close quickly)
3. Open Network and Sharing Center
( To open Run/CMD Command control.exe /name Microsoft.NetworkAndSharingCenter
- Or Follow here)
4. Click on Change adapter settings
Now you will see all the Network Connections including the currently created Network with a name related to Local Area Connection* 13 or the same.

5. Right Click on the currently using Internet Connection (in my case Ethernet) and select Properties.
6. In the Properties window click Sharing tab and do the following
- Set the Created Wifi hotspot Connection on Home networking connection. (in my case Local Area Connection* 13)
- tick (check) Allow other network users to connect through this computer’s internet connection.
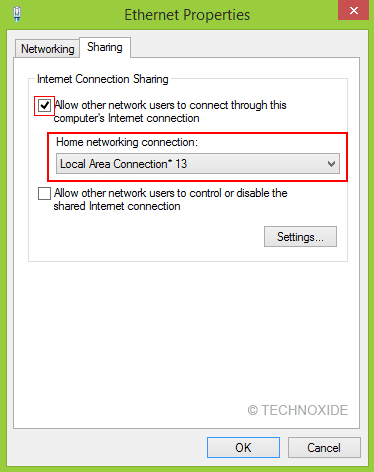
7. Finally, Click OK...
That’s it...Done ! ... Now You are successfully shared your PC/Laptop Internet Connection. Tap on Wifi in your smart phone or any other WiFi enabled device to browse your PC Internet.


No comments:
Post a Comment